Graduation Cap Decoration: A Complete Guide to Personalizing Your Achievement
There is something magical about the moment you place your decorated graduation cap on your head for the final time. After years of hard work, countless late nights, and innumerable sacrifices, this simple mortarboard becomes a canvas for celebrating everything you’ve accomplished. Graduation cap decoration has evolved from a casual personal touch into a beloved tradition, a way for graduates to express their individuality, honor their journey, and create a lasting keepsake of one of life’s most significant milestones. Whether you’re a natural artist or someone who struggles to draw a straight line, decorating your cap offers an opportunity to make your graduation day uniquely yours. This comprehensive guide explores everything you need to know about graduation cap decoration, from planning and design to execution and preservation.
The Tradition of Decorating Graduation Caps
Before diving into specific techniques and ideas, it’s worth understanding how this tradition developed. While students have personalized their caps for decades, the practice exploded with the rise of social media platforms like Pinterest and Instagram, where graduates began sharing their creations with the world.
Today, decorating graduation caps has become an expected part of commencement ceremonies across the country. Students spend hours designing and creating caps that reflect their personalities, their majors, their aspirations, and their gratitude. The result is a sea of creativity during graduation ceremonies, with each cap telling a unique story.
Most educational institutions permit cap decoration as long as it doesn’t interfere with the ceremony or violate specific guidelines. Common restrictions include no political messages, no offensive content, no commercial advertising, and nothing that might obstruct the view of other graduates. Always check your school’s policies before investing time and materials in your design.
Planning Your Graduation Cap Design
Successful cap decorations don’t happen by accident. Thoughtful planning ensures your creation looks professional and communicates exactly what you intend.
Start Early
Begin thinking about your cap design at least a month before graduation. This gives you time to brainstorm ideas, gather materials, and execute your vision without last-minute stress. Rushed decorations rarely turn out as well as thoughtfully planned ones.
Browse social media platforms like Pinterest and Instagram for inspiration, but don’t feel pressured to copy what you see. The best caps are those that feel authentic to you, not just trendy reproductions of popular designs.
Consider Your Message
What do you want your cap to communicate? Some graduates choose inspirational quotes that have motivated them throughout their academic journey. Others express gratitude to family members who supported them. Many incorporate humor, celebrating the lighter side of their educational experience. Some simply display their future plans or dream jobs.
Your message should feel genuine. If you’re naturally witty, humor might suit you. If you’re deeply grateful, a tribute to parents or mentors might feel right. The most memorable caps reflect the graduate’s authentic personality.
Choose Your Visual Direction
Beyond words, consider the visual elements of your design. Will it feature your school colors? Symbols related to your major? Images that represent your personal journey? A cohesive visual direction ties everything together and creates a professional-looking result.
Sketch your ideas before committing. Experiment with layout, consider how text and images will work together, and think about how the design will read from a distance. Remember that photos will be taken from various angles; your design should work from all of them.
Assess Your Skills Honestly
Be realistic about your artistic abilities and available resources. A simple, well-executed design always looks better than an ambitious but poorly executed one. If your drawing skills are limited, consider using vinyl lettering, printed decals, or stencils. Many graduates collaborate with artistically gifted friends or family members.
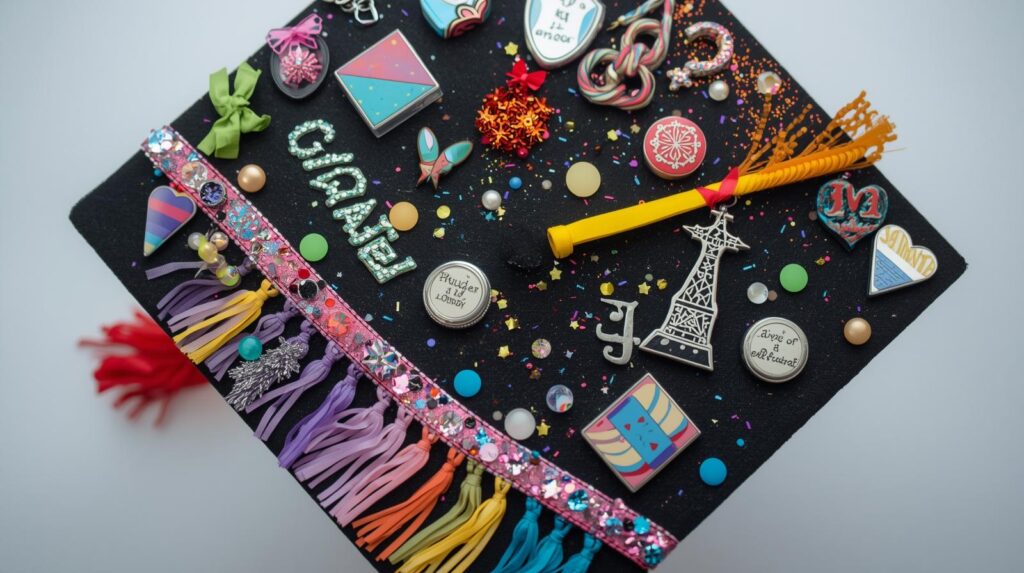
Materials and Tools for Cap Decoration
Having the right supplies makes the difference between frustration and satisfaction. Gather everything you’ll need before you begin.
Essential Supplies
- Your graduation cap (buy an extra if possible for practice)
- Pencil and eraser for sketching
- Ruler or measuring tape for precise placement
- Painter’s tape for creating clean lines
- Paper towels and water for cleaning brushes
- Drop cloth or newspaper to protect your work surface
Painting Supplies
Acrylic craft paint works well on mortarboard surfaces. It adheres properly, dries quickly, and comes in countless colors. Paint pens offer more control for detailed work and lettering. Fine-tipped brushes allow precision for intricate designs.
If your design requires a different background color than your cap’s original finish, you’ll need base coat paint and sufficient drying time between layers.
Adhesive Options
Hot glue guns provide strong, quick adhesion for three-dimensional elements. Craft glue works for paper elements but requires longer drying time. Double-sided tape offers a clean option for attaching flat items. Spray adhesive covers large areas evenly.
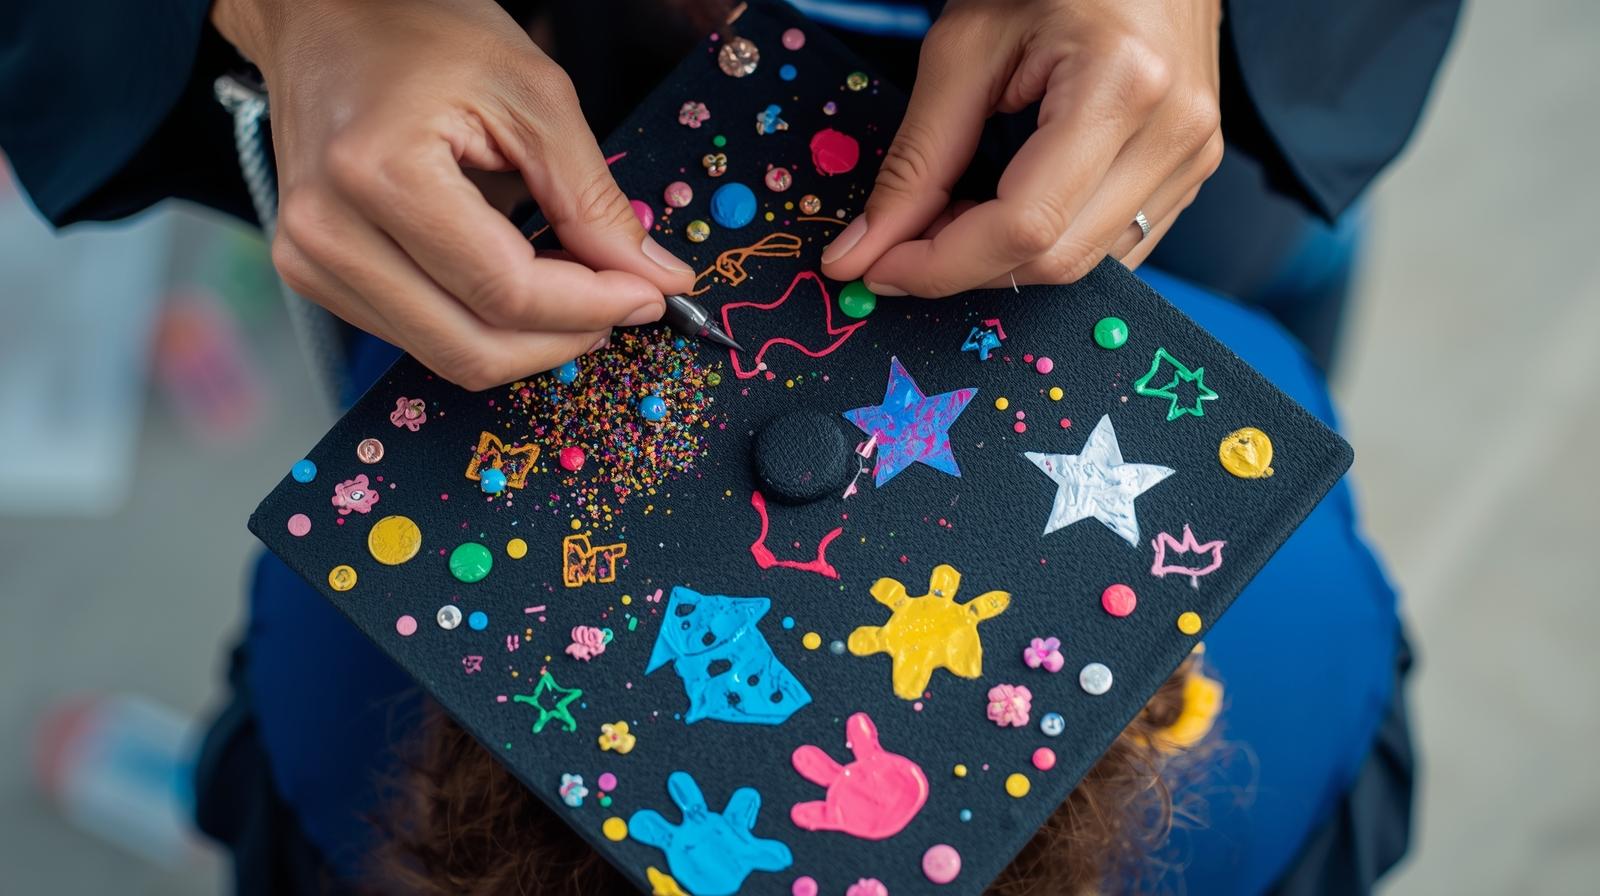
Decorative Elements
Vinyl letters create professional-looking text with minimal effort. You can purchase pre-cut letters at craft stores or order custom designs online. Rhinestones, sequins, and glitter add sparkle and texture. Fabric, ribbon, and paper elements create dimensional interest. Printed images and photographs personalize your design meaningfully.
Protective Finish
Clear sealant spray protects your finished design from moisture and handling. Test on a small area first to ensure compatibility with your materials. Matte finishes reduce glare; glossy finishes add shine.

Popular Graduation Cap Themes
Understanding common themes helps you find inspiration and identify what resonates with you.
Inspirational Quotes
Words that have carried you through difficult times make powerful cap statements. Lines from books that changed your perspective, lyrics from songs that got you through late nights, or quotes from mentors who believed in you all work beautifully.
Popular inspirational themes include “The future is bright,” “She believed she could, so she did,” and “Well behaved women rarely make history.” The most effective quotes, however, are those that genuinely speak to your personal experience.
Gratitude and Tributes
Many graduates use their caps to thank the people who made their achievement possible. “Thanks for the gas money, Mom” acknowledges the countless small sacrifices parents make. “I made it, Abuela” honors family members who dreamed of this moment. “For my kids, so they know anything is possible” expresses the deeper purpose behind the graduate’s efforts.
These tribute caps often prove the most emotional at graduation, bringing tears to family members who see their support acknowledged so publicly.
Humor and Wit
Graduation doesn’t have to be entirely serious. Humorous caps celebrating the end of exams, the completion of difficult requirements, or the absurdities of academic life add levity to the ceremony.
“Finally finished” with a skeleton in a graduation cap has become a classic. “I can’t believe I paid for this” captures the ironic humor many graduates feel about tuition costs. “All that for a piece of paper” acknowledges the struggle while celebrating its conclusion.
Major-Specific Designs
Your field of study offers rich material for cap decoration. Nursing graduates often incorporate medical symbols and heartfelt messages about patient care. Engineering students feature equations and structural designs. Art majors create miniature masterpieces. Education majors honor the teachers who inspired them and the students they’ll soon teach.
These designs celebrate your chosen path while demonstrating the knowledge you’ve gained. They also help fellow graduates and faculty identify with your achievement.
Pop Culture References
Movies, TV shows, books, and music that shaped your college years make excellent cap material. Harry Potter quotes about magic and achievement, Disney references about dreams coming true, and lyrics from your favorite bands all connect your education to the culture that surrounded it.
These references create instant connections with fellow graduates who share your cultural touchstones, sparking conversations and shared moments of recognition.
Future Plans
Some graduates use their caps to announce their next steps. “Off to medical school,” “Future teacher,” or “Next stop: the real world” signal what comes after graduation. Others express broader dreams: “World traveler,” “Changemaker,” or simply “Here for it all.”
These forward-looking designs celebrate the achievement while acknowledging that graduation is a beginning, not an ending.
Simple and Minimalist
Sometimes less is more. A single word—”Finally,” “Done,” “Worth it”—can communicate as powerfully as elaborate designs. Your initials and graduation year, your school’s logo, or a simple symbol of your achievement all create elegant, understated caps that photograph beautifully and never feel dated.
Step-by-Step Decoration Process
Follow these steps for a successful cap decoration experience.
Prepare Your Cap
If your cap has a glossy finish that might repel paint, lightly sand the surface with fine-grit sandpaper. This creates “tooth” for paint to adhere to. Wipe away all dust with a slightly damp cloth and allow to dry completely.
Apply Base Coat if Needed
If your design requires a different background color, apply a base coat and allow it to dry completely. Multiple thin coats work better than one thick coat. Allow proper drying time between coats according to your paint’s instructions.
Transfer Your Design
Lightly sketch your design on the cap with pencil before committing to paint or adhesive. This allows adjustments and ensures proper placement. Use a level for straight lines and measure distances for balanced composition.
Execute Your Design
Work carefully, allowing adequate drying time between steps. For painting, apply multiple thin coats rather than one thick coat for smoother results. For vinyl and stickers, apply firmly and smooth out bubbles from center to edges.
For three-dimensional elements, test placement before applying adhesive permanently. Arrange everything, step back to assess, and adjust until satisfied before gluing.
Seal and Protect
Once your design is completely dry and all elements are securely attached, consider applying a clear sealant spray. This protects against moisture and handling during the ceremony. Test on a small area first to ensure compatibility.
Final Inspection
Examine your finished cap in good light. Touch up any imperfections. Ensure all elements are securely attached. Place it on your head and check how it looks from all angles. Have a friend photograph you from various distances to ensure text is readable and the design works as intended.
Tips for Success
These practical tips help ensure your cap turns out beautifully.
Practice First
If you’re using new techniques or materials, practice on scrap material before committing to your cap. This builds confidence and reveals any issues before they matter.
Work in Good Light
Natural daylight shows colors accurately and reveals details you might miss under artificial light. If working at night, use multiple light sources to eliminate shadows.
Allow Adequate Drying Time
Rushing drying time leads to smudges, smears, and ruined designs. Follow paint instructions carefully and be patient between layers.
Consider Readability
Text should be readable from at least 10 feet away, as photos will be taken from various distances. Large, clear fonts work better than elaborate scripts. High contrast between text and background improves visibility.
Test Weight
If adding three-dimensional elements, test the cap’s weight and balance before graduation day. Very heavy caps may sit awkwardly or fall off during the ceremony.
Photography Tips
Your decorated cap will feature prominently in graduation photos. Consider these photography considerations.
Lighting
Metallic and reflective materials can create glare in photos. Test how your design photographs in various lighting conditions. Outdoor photos in natural light often look best.
Composition
Plan how your cap will appear in photos. Ensure text isn’t cut off at the edges. Consider whether you want photos with the cap on, off, or both.
Backup Photos
Take professional-quality photos of your cap alone before the ceremony. These serve as backup in case ceremony photos don’t capture it well and provide detail shots for your records.
Graduation Day Guidelines
The big day requires some additional considerations.
Arrival
Bring your decorated cap carefully to the ceremony, protecting it from damage. Consider carrying it in a box or bag rather than wearing it through crowds.
Placement
Ensure your cap sits properly on your head throughout the ceremony. Practice walking with it beforehand. Bring extra adhesive or safety pins for emergency repairs.
Etiquette
Be mindful of others. Very tall decorations may block views behind you. Extremely reflective materials may create glare in others’ photos. Consider how your design affects fellow graduates.
Preserving Your Cap
After graduation, your decorated cap becomes a cherished keepsake deserving proper care.
Cleaning
If your cap needs cleaning, spot clean gently with a slightly damp cloth. Avoid soaking or scrubbing, which could damage decorations.
Storage
Store your cap flat to prevent warping. Keep away from heat, moisture, and direct sunlight, which can fade colors and damage materials. Acid-free boxes provide ideal storage.
Display
Many graduates display their caps in shadow boxes alongside their diploma, tassel, and graduation photos. This preserves the cap while allowing you to enjoy it daily.
Conclusion: Your Achievement, Your Expression
Your decorated graduation cap represents far more than a craft project. It embodies your journey, your personality, and your achievement. The hours spent designing and creating it become part of your graduation story, as meaningful as the ceremony itself.
Whether you create an elaborate masterpiece or a simple, elegant design, your cap will feature in photographs that you’ll treasure for decades. It will remind you not just of the achievement but of who you were at this moment, what mattered to you, and how you chose to express it.
So take time with your design. Let it reflect the real you. Celebrate your journey, honor those who helped you along the way, and look forward to the future with optimism and style. Your graduation day comes once; make it memorable with a cap as unique as your achievement. Congratulations, graduate—now go create something beautiful.